
Dev Log - Deploying an Angular Universal App to Cloud Run Pt. 1
Learn to Deploy an Angular Universal Application to Google Cloud Run within an Nx Monorepository


For the past month, I've focused on a new app that scratches my own itch for disseminating the content I generate for NgServe.io. The idea rattled around my head for years about creating a marketing campaign site that connects to different social media platforms and an email provider.
After grinding through a few YouTube video productions, I spent mornings broadcasting messages and links to six different social media and link aggregators. Why am I wasting so much time posting these links? Time to automate.
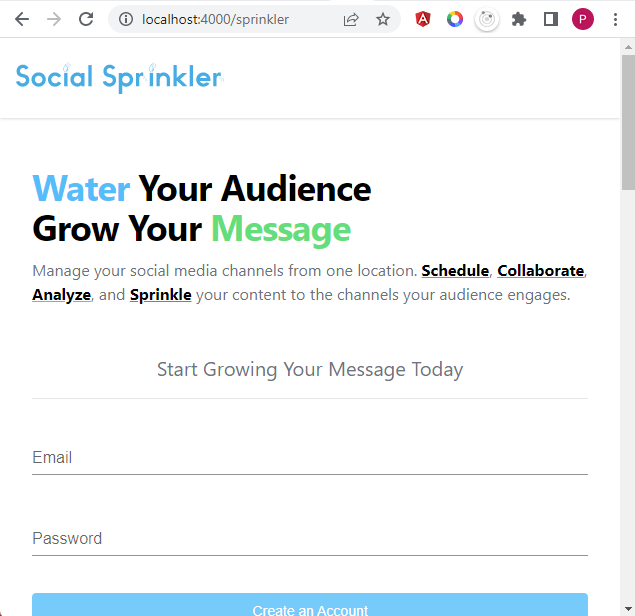
My first objective involved creating a landing page. The page describes the product and objectives for onboarding customers. I created a couple of forms that allow prospects to sign up for an email list or create their credentials for logging in via Firebase.
Page speed matters to prevent potential customers from leaving before you get a chance to give your message. Customer impatience increases bounce rate as described in Neil Patel's article - How to Increase Page Speed. Decreasing the wait time for First/Largest Contentful Paints, Cumulative Layout Shift, and First Input Delay, I decided to implement Angular Universal for Server Side Rendering using the following article.
 Jared Christensen
I plan to move this setup into the @ngserveio/ws nx-plugin followed by pre-rendering pages for static content.
Goals
1. Create a Docker Image for Running Angular Universal Application
2. Build, Tag, and Push to Artifact Registry
3. Deploy to Cloud Run
Create the Docker Image
If you followed along in the Nx / Angular Universal Article, the project.json created includes a couple of new targets. In order to build the application, the server target builds application copying the output to a server directory.
To make it obvious to others that may come into this repository, I created a docker directory containing my client.dockerfile and .dockerignore.
node_modules/
.env
.angular/
coverage/
Docker ignored files and folders
I picked node:14-slim image. I'm not installing node_modules in this directory as all I care about is the transpiled JavaScript output from my build. This will keep my dockerfile light weight.
FROM node:14-slim

ARG NX_PROJECT_OUTPUT_DIR
ARG MAIN_JS

ENV MAIN_JS ${MAIN_JS}

RUN mkdir /app
COPY $NX_PROJECT_OUTPUT_DIR /app
WORKDIR /app
EXPOSE 4000

CMD node ${MAIN_JS}
Docker File for Building Angular Universal Application
At the root of my repo, I ran the following Docker command to build an image.
docker build -f docker/dockerfile --build-arg NX_PROJECT_OUTPUT_DIR="./dist/apps/<output-path>" --build-arg MAIN_JS="./main.js" -t my-image-name:0.0.1 .Build the Docker Image with Build Args
Testing that the docker image runs locally, the local port 4000 binds to the image's exposed port 4000.
Once I have Cloud Build enabled, I plan to store some of this configuration for the type of application, node or Angular, to determine the docker file to use and build arguments within the project.json.
docker run -p 4000:4000 -d my-image-name:0.0.1Initial start of the server returns an error stating the index view cannot be found. This at least tells me the server runs, but the index view path referenced requires change as the process works from a different working directory.
The image's working directory falls under /app. In development mode, the process executes at the root directory of the repo. I alleviated this issue by modifying the ssr.server.ts file. I changed the distFolder based on the process's current working directory checking if the browser folder exists at the same level as process.
export function app() {
const server = express();
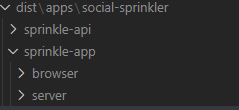
const distFolderPath = existsSync(join(process.cwd(), 'browser'))
? 'browser'
: 'dist/apps/social-sprinkler/sprinkle-app/browser';
const indexHtml = existsSync(join(distFolder, 'index.original.html')) ? 'index.original.html' : 'index';
// Our Universal express-engine (found @ https://github.com/angular/universal/tree/master/modules/express-engine)
server.engine('html', ngExpressEngine({
bootstrap: AppServerModule,
}));
server.set('view engine', 'html');
server.set('views', distFolder);
// .... rest left out for brevity
}Modified distFolderPath due to differences for where the process executes
The container runs and is working in the browser, I can deploy the image to Google Cloud Artifact Registry.
Build Tag and Send to Artifact Registry
Cloud Run spins up containers within it's system and references images from either Container Registry or Artifact Registry. In a previous application, I used Container Registry moving an application from App Engine to Cloud Run.
 Paul Mead
I set up my Artifact Registry with the steps in the quick start below. If I can give the Google Cloud Team kudos, they provide clear steps to configuring and deploying to Artifact Registry.

With the Artifact Registry service enabled and Docker configured on my local, I can tag and push images to the registry using the command below.
# Tag the image locally
docker tag <my-image-name>:0.0.2 us-<region>-docker.pkg.dev/<project-name>/<grouping-folder>/<my-image-name>:0.0.2

# Push the tagged image
docker push us-<region>-docker.pkg.dev/<project-name>/<grouping-folder>/<my-image-name>:0.0.2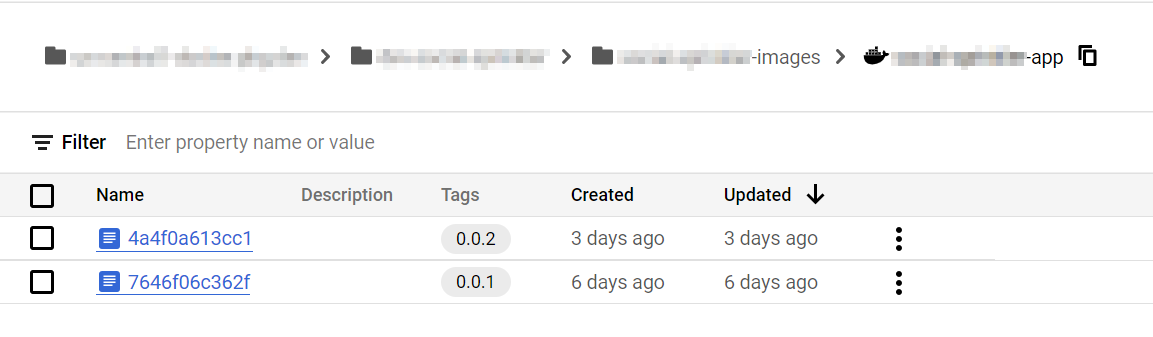
Deploy to Cloud Run
As I was working in a new project, I enabled the Cloud Run Api. I can automate the following steps later with gcloud cli and when I want to use it within Cloud Build. For this example, I used the console to create my service. In the name of progress, console suffices.
Open the Cloud Run Console and click the Create Service button.

I selected the Docker Image deployed in an earlier step. The Service name mimics the project name in my Nx Monorepository. I left the default of the CPU Allocation.
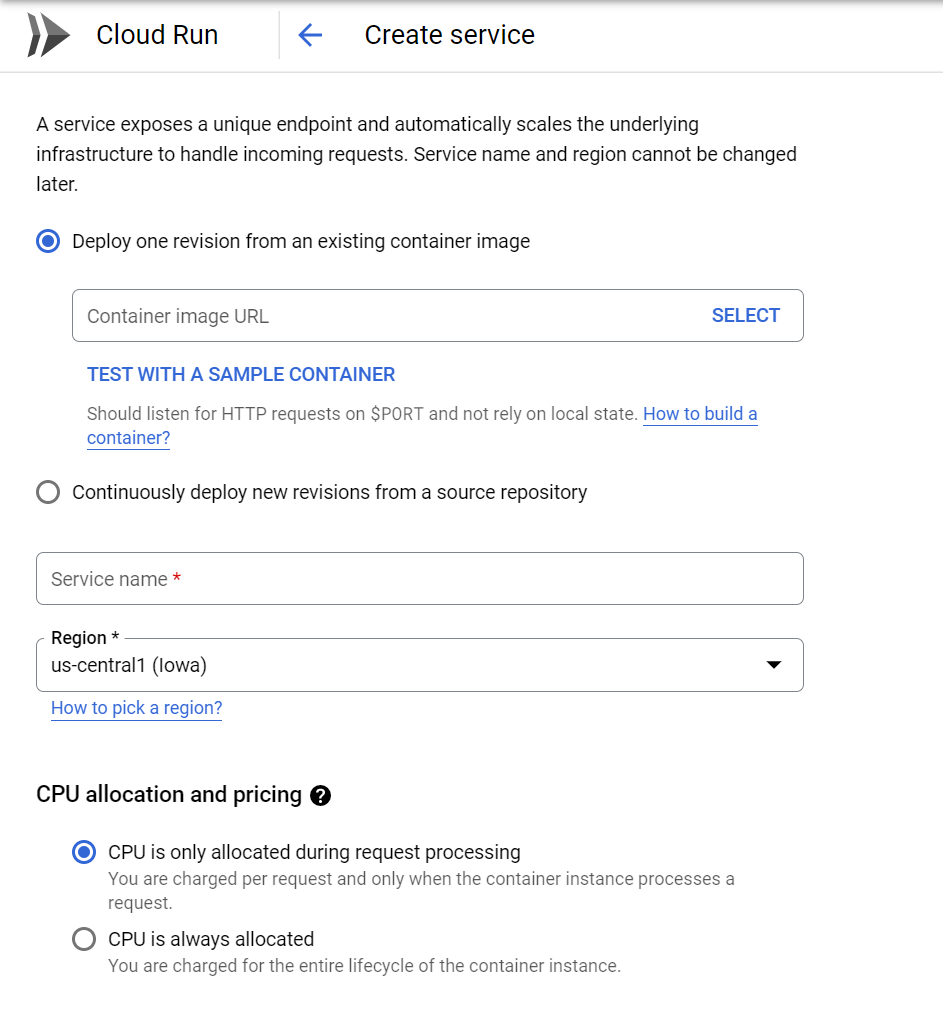
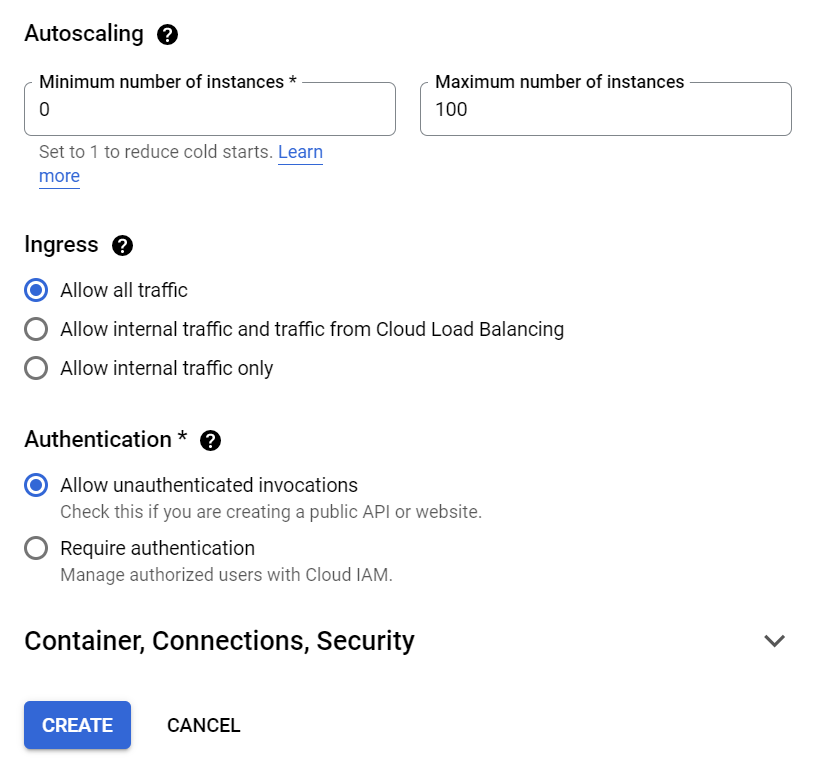
I set the Maximum number of instances to be 1. Keeping the max instances available to one will keep my cost low for a development environment, and I don't need to scale in non-production environments. I want the application to be accessible from to the internet, so I Allow all Traffic, and Allow Unauthenticated Invocations.
Click Create to generate a Docker Container that runs as a Cloud Run service.
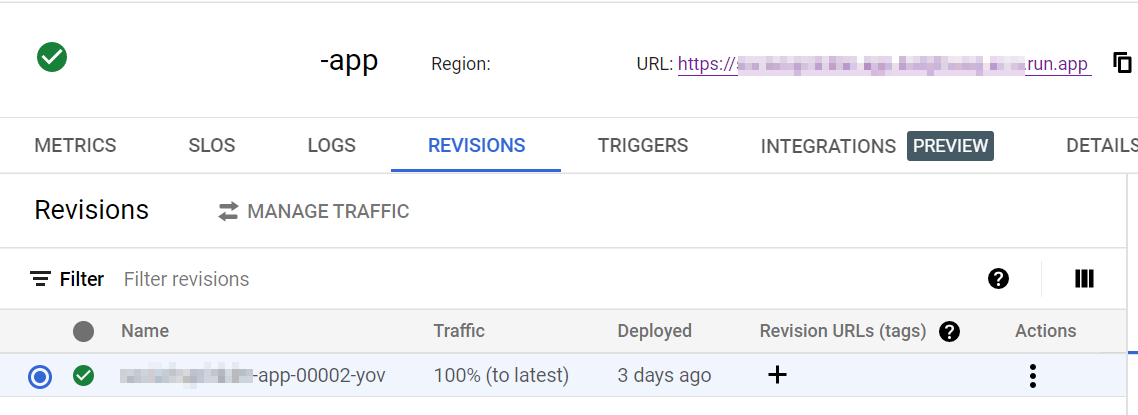
If the container starts, the green check mark displays and you can navigate to the running service via the URL.
Conclusion
Deploying an Angular Universal Application to Google's Cloud Run involved a few services to be enabled to deploy an application.
- Cloud Run
- Artifact Registry
Dockerizing the Angular Universal application required me to know where the node process was running. The Express HTML view engine points to the output of the browser files to render the index.html page.
Social Sprinkler Project: https://socialsprinkler.com.
In Part 2, I'll cover the following topics:
- Deploying an API Service
- Creating a Custom Domain
- Configuring a Load Balancer